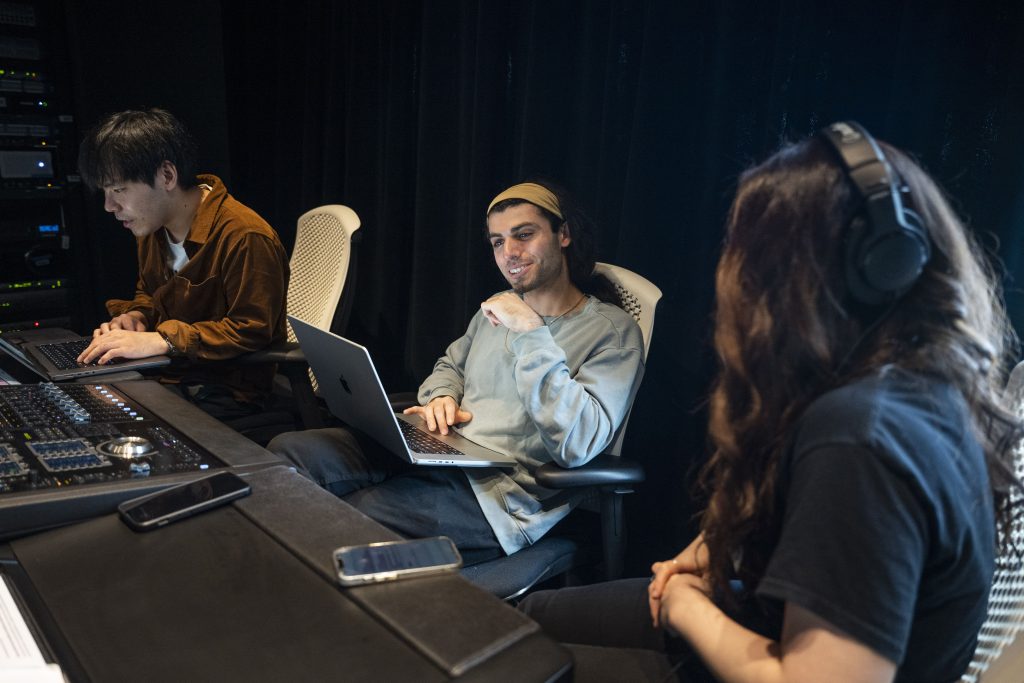
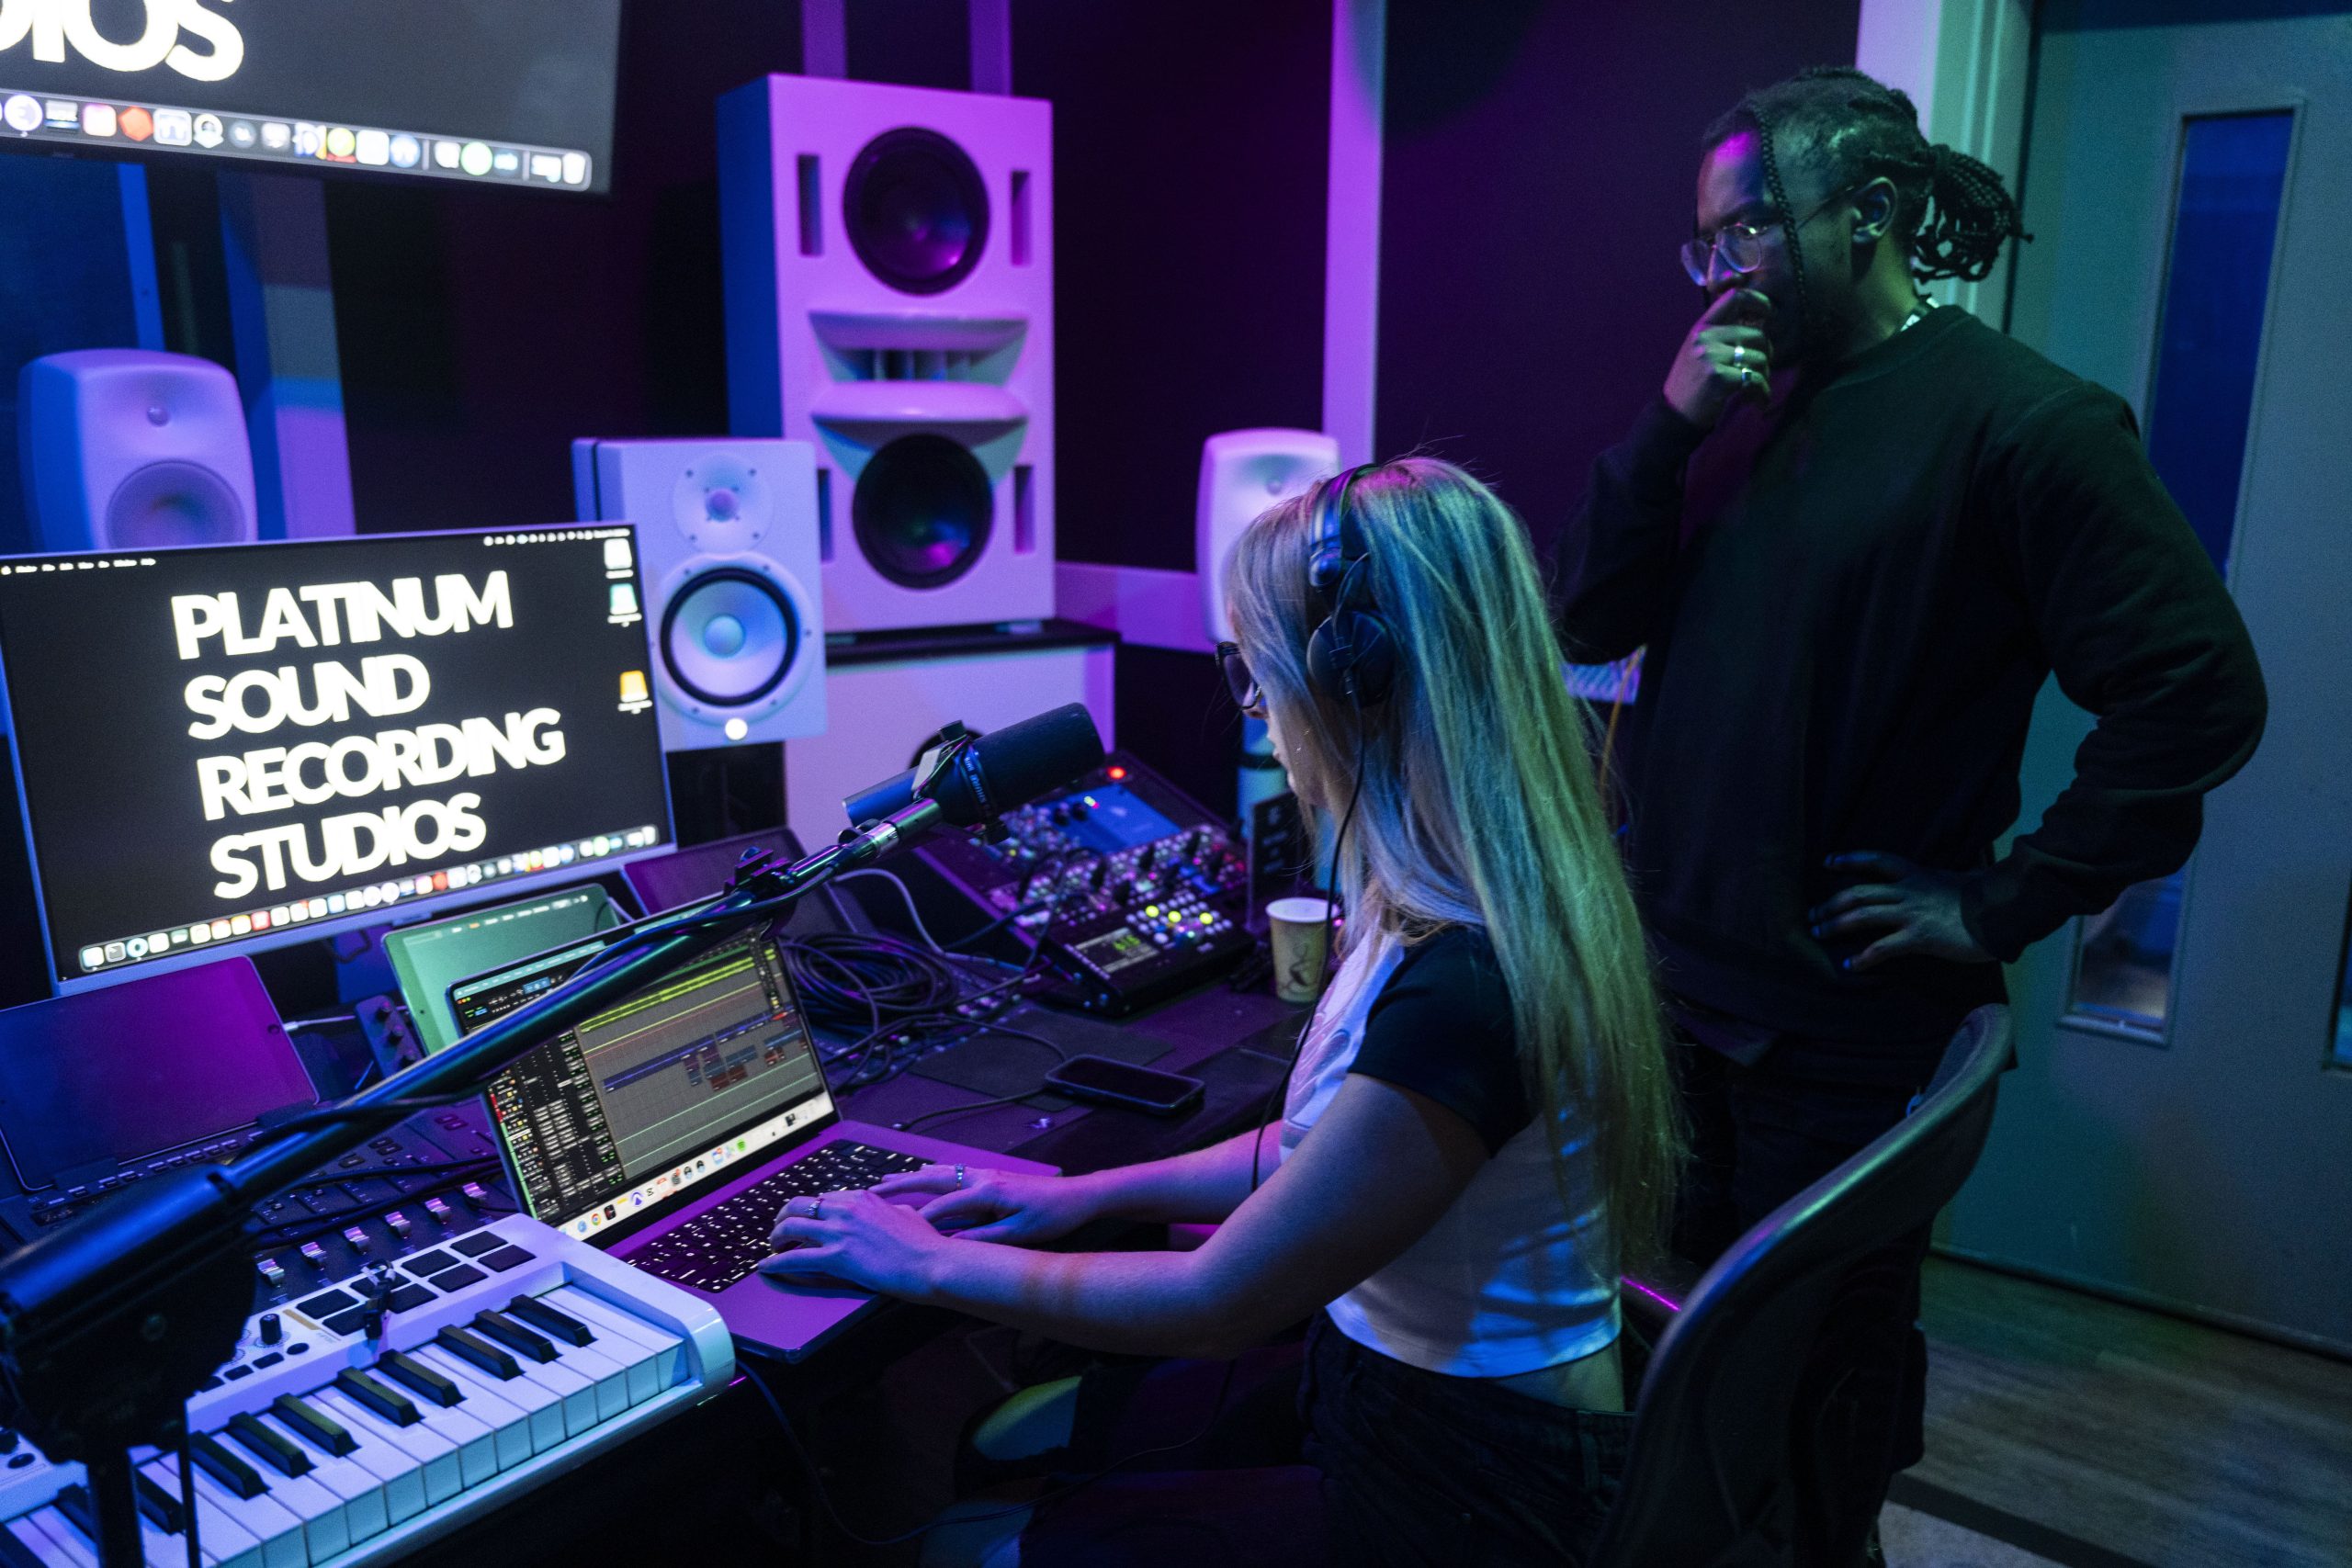
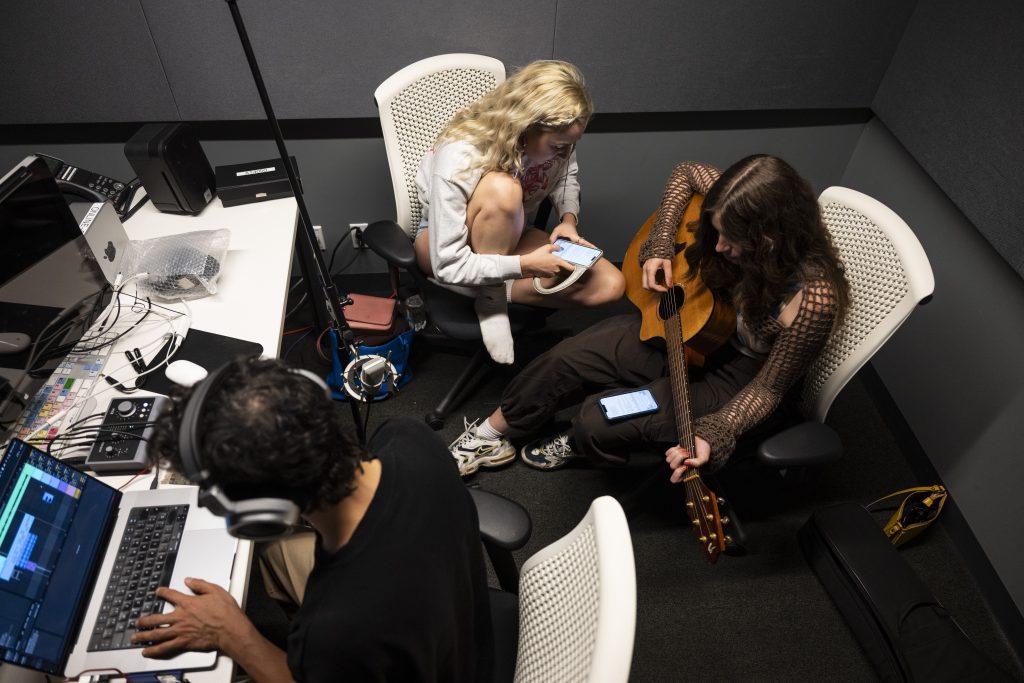
Audiomovers recently partnered with Anti Social Camp – the world’s largest writing camp which took place on June 10-15 across some of New York City’s most notable music venues and studios.
The event brought together 200 songwriters, artists, and producers from around the world to craft new hits, collaborate, and share their passion for music.
During the writing camp, participants were divided into groups of three: an artist, songwriter and producer.
Each team was provided with LISTENTO licenses, allowing them to complete the songs remotely and maintain the global creative partnerships formed at Anti Social Camp.
The upcoming Anti Social Camp, Vol. 2 expands on the earlier release of the Anti Social Camp, Vol. 1 compilation album. This edition features a selection of songs written and recorded at this year’s event and is set to be released later this year.
Keep up with the latest from Anti Social Camp here.
Warren Huart and Audiomovers Head of Product Igor Maxymenkowalk through OMNBIUS 3.0 and the process of configuring it for various routing scenarios. Whether you’re setting it up for a simple podcast recording or a complex multi-machine audio production, watch now on Produce Like A Pro.
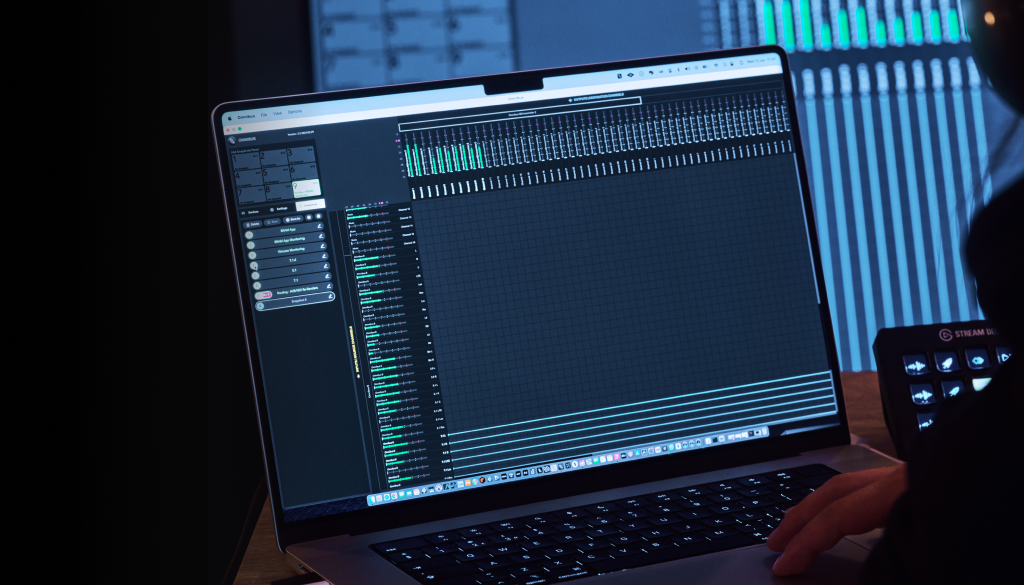
The audio routing software which operates as virtual patchbay for Mac has had its biggest update yet. OMNIBUS 3.0 turns any Mac into a networked audio device which can connect 256 channels of I/O to any other Mac on the same network.
It also now supports application capture, and can be controlled via StreamDeck or MIDI controllers. Check out the full list of new features below or start your 7-day demo.
OMNIBUS can handle even the most complex routing scenarios with ease, and makes networking audio easier than ever before.
Route multichannel audio between different machines connected to the same network via AVB or NDI
Four configurable virtual audio devices with up to 256 I/O channels per device
Separate system and application audio outputs and use applications as audio sources in the OMNIBUS routing matrix
Save and load routing snapshots or entire OMNIBUS sessions and open them on other machines
Switch routing snapshots from an Elgato Stream Deck, MIDI controller, key commands or Hot Snapshot panel
OMNIBUS already allows Mac users to route audio seamlessly between all devices – physical and virtual – connected to their Mac, but OMNIBUS 3.0 adds application capture, so users can easily grab audio from any software running, rather than needing to route that audio first to a virtual device.
The audio routing software – which operates like a virtual patchbay between applications and audio devices on a Mac – now features networking functionality, with support for NDI and AVB network protocols.
This new networking functionality means OMNIBUS 3.0 can send and receive multichannel audio from any other machine on the same network, turning any Mac into an audio device with full multichannel I/O. (OMNIBUS can send and receive 256 channels of audio via AVB or 128 with NDI, but users can create multiple AVB ‘devices’ in OMNIBUS to send and receive audio).
Film and TV composer and sound designer Dan Zlotnik remarks “When collaborating, being able to patch computers with different DAWs and different sample rates straight into my session has changed my whole workflow, this is such a powerful feature. With Omnibus 3.0 I can easily and quickly network all Mac machines on the session, this has never been so easy”.
Mix Engineer Adam Hawkins says “OMNIBUS 3.0 has really sped up my workflow when mixing. I use it to A/B/C/Ding multiple sources while working on a stereo mix. I can A/B/C with my current mix, the rough mix that was sent to me, and my last pass if I’m doing a revision. When working with Dolby Atmos I use it to A/B with the 7.1.4 mix against the stereo master.”
GRAMMY-winning producer Rafa Sardina added, “OMNIBUS 3.0 represents the future of audio applications. You can just come in and start making music, there is no learning curve, no frustration with setup. You don’t need to be a scientist to make music or use audio tools, but you do need to be one to make tools like Omnibus 3.0. The future is being made by the scientists at Audiomovers.”
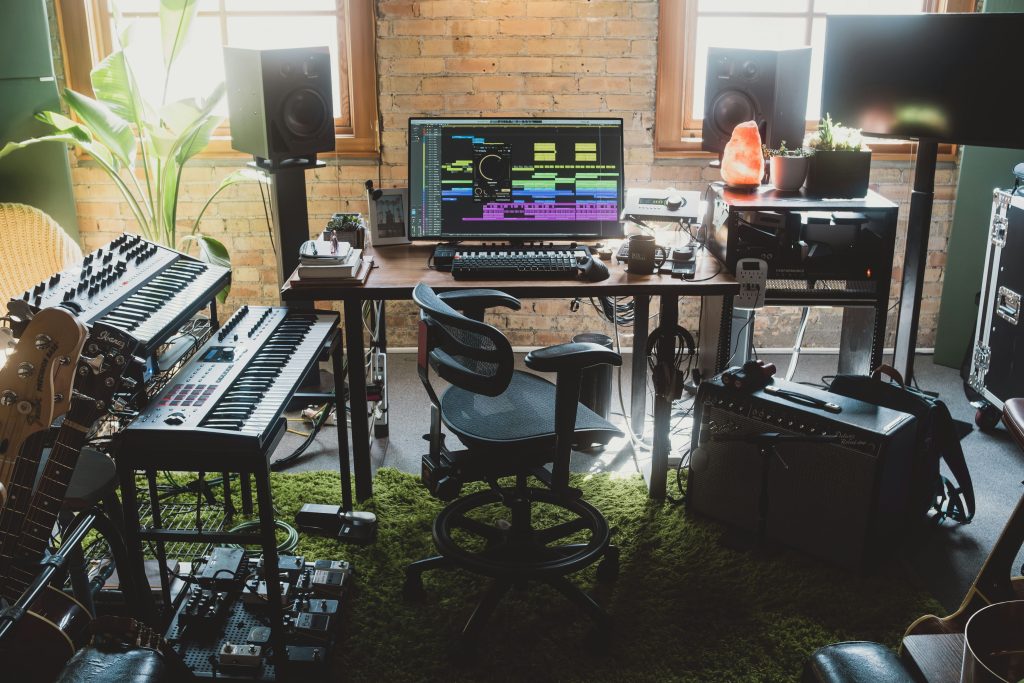
Setting up a home studio is a natural step for anybody who is interested in music production, but the options can at first appear bewildering. While I’m yet to meet anybody who claims to have ‘finished’ their home studio, broadly speaking the studios I’ve encountered fall into two camps – those which grow and develop over time and those which are reconsidered and started over, and over, and over.
To avoid making the wrong decisions when setting up your studio, it’s important first to ask yourself the most important question. What do you want to do in your studio?
What are you going to use your home studio for, and how?
It might be tempting to say “everything”, but for a successful studio I would suggest that that’s not a good answer. What do you do now and what do you want to do next? Trying to accommodate those two questions is probably as far as I would consider planning for. Are you a producer or a beat maker? Are you In a band? Are you a songwriter? If so, what if any audio recording do you think you’re going to need to do? Will you be completing your projects with the help of others, or do you imagine you’ll be working entirely solo? If you have answers to these questions then you’re in with at least a fighting chance of avoiding potentially costly mistakes.
What space do you have available for your home studio?
The second consideration you need to take into account is what space you have available. The majority of equipment doesn’t necessarily have to be all that expensive, instead it’s the space in which you do your work which will be the most expensive part of your studio, and the part you have the least ability to fundamentally change. You might well have the gear and the skills necessary to record your band, but unless you have a suitable space, you’ll probably be better off recording elsewhere. This doesn’t have to mean hiring a recording studio, though that is often a great idea. If you want to record bands then consider making the core of your studio easily transportable and rather than bringing the musicians to your studio, take the studio to the musicians. There are always options.
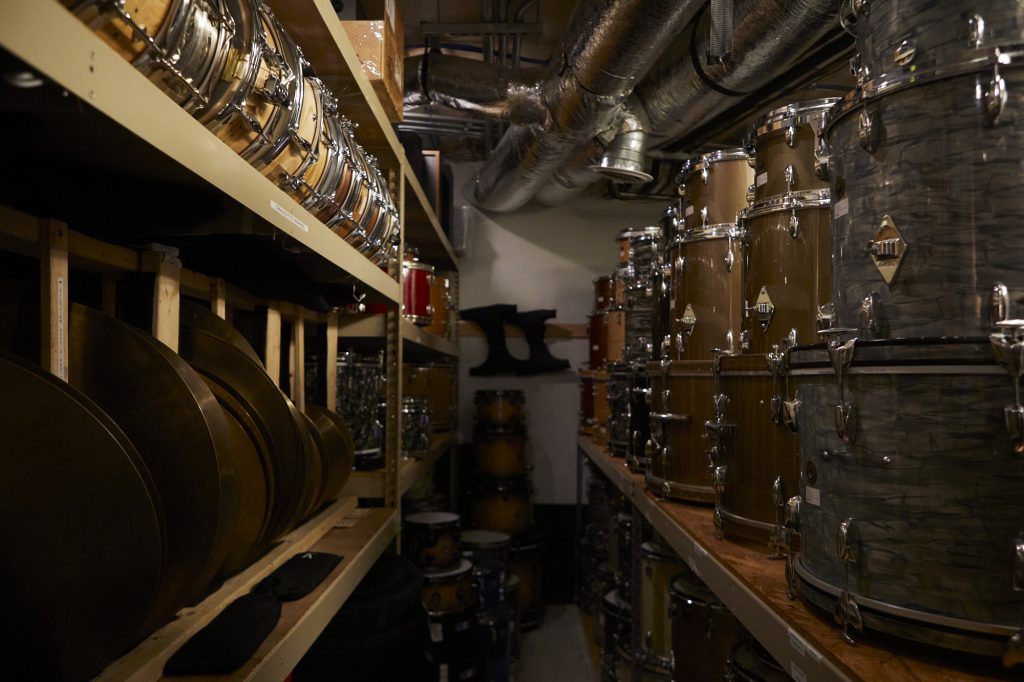
For example some instruments don’t record as well in smaller spaces. A drum kit might fit in your space at home but a low ceiling will cause reflections which will color the overhead mics which are so crucial to capturing the sound of the kit. A smaller room will limit your choices when it comes to placing room mics and even using very close miking you can never entirely avoid the sound of your room. Bigger rooms can be more forgiving to work in so it can be very worthwhile to find a suitable space you can hire. if you’re bringing your own gear it doesn’t have to be a studio, as long as it sounds good, is quiet and you can make a noise without upsetting anyone it can be a great option.
How much should you spend on a home studio?
Once you know where you are going to be working and what kind of work you want to do, the next consideration is budget. Choosing and buying gear is of course exciting, but when planning your budget be aware that the less exciting things like cables and stands all need to be factored in or you’ll end up in an environment which will make your life more, rather than less, difficult. When it comes to choosing gear, I’d recommend buying gear you won’t outgrow. A few pieces of quality gear which will stay with you as your experience and your studio grows is far better than an Aladdin’s cave of budget gear you’ll end up selling, or binning when it breaks. I’ve still got a pair of Genelec 1029a, my first proper monitors, which I use as secondary monitoring over by my keyboards now that they have been replaced by something bigger. And I still use the first condenser mic I ever bought: A Neumann TLM103 which I had to save for but it still stands up to the alternatives now that my mic locker has grown. If you can’t buy once and keep, buy no more than twice. Get something which will get you started and, when you can afford it, move up to something you’ll keep forever. Upgrade, but avoid moving sideways in terms of quality.
Computers And Software
The exception to the rule of trying to buy something you will keep forever is your computer and its software. Computers are effectively disposable. While they serve a purpose, they have to be replaced arguably sooner than any other bit of gear. Exactly which type of computer – Mac or PC – you choose is a matter of preference. The debate between Windows and Mac users rages online and will continue to do so but if you are happy using a PC then use one. Likewise if you prefer using a Mac then that is your choice. That said, in my opinion, here are a couple of advantages to using a Mac for music production. One is Core Audio, which makes life very simple for people using their computers for audio and for tasks like routing audio between applications due to the availability of very elegant software solutions which are very difficult to match without access to this technology. MacOS also supports AVB networking which, for users of hardware which uses this non-proprietary method of routing audio over ethernet networks, is significant.
The most obvious difference between using a PC and using a Mac for people starting a home studio is how it affects their choice of DAW. Logic Pro is very popular but it’s Mac only. The downsides to using Macs are that they are significantly more expensive than PCs and they are unsuitable for people who like to upgrade, rather than replace their computers. As well as a computer and some software, don’t overlook the need for a mouse or trackball. An extended keyboard is necessary for proper control of some DAWs and assuming you’re going to work with MIDI, a MIDI keyboard controller is very desirable too.
Don’t assume your computer should be a laptop. Desktop computers feel rather old-fashioned as I write this in 2024, but while modern laptops are more than powerful enough for studio use there are some practical benefits to having a dedicated studio computer, and desktops are extremely suitable for this purpose. One of the disadvantages of using a laptop is noise. Laptops are inherently less able to stay cool without relying on small, noisy fans. Fan noise is unwelcome in studios.
Which DAW?
While hardware recorders still exist, computers are now overwhelmingly the default choice for recording and audio production. As such, your choice of DAW (Digital Audio Workstation) software should be made with care as you’ll invest many, many hours learning to use this software. While there is no such thing as the wrong choice when it comes to choosing between the principal contenders, this is a decision which will stay with you throughout your involvement in audio production.
Broadly speaking all the major DAWs are suitable for any and all types of music production, but certain DAWs will be preferred in different scenarios and for producing different genres. For example, Ableton Live is extremely popular with producers of entirely electronic music, and Pro Tools is particularly prevalent in professional studios, especially for tracking, but these preferences probably aren’t what should guide your choice as much as your peer group and their choices should. Using the same DAW as other people you know who share your interests can be very beneficial in terms of support and sharing knowledge and sessions.
Audio Interfaces
With a computer, a DAW, and a space in which to work, whether that is a corner of a bedroom or a dedicated room in your house, the next decision which has to be made is choosing an audio interface. If you want to produce music entirely within your DAW and don’t anticipate needing to record any external audio at all then you might not even need an interface. You could probably get by using just the audio I/O of your computer but a dedicated audio interface is still a good idea: Having a dedicated volume control for your monitor speakers and a separate set of outputs for both monitors and your headphones is preferable, and a basic USB audio interface isn’t expensive.
Audio interfaces can cost anywhere from comfortably under $100 to several thousand dollars and while all interfaces do the same job, the quality and facilities vary hugely. In 2024 the choice of data connection between interface and computer is usually between USB3 and Thunderbolt. Thunderbolt is available as standard on current Apple computers but is not standard on PCs. It provides greater bandwidth and speed than USB but USB 3 is fast enough for most tasks and the quality of stability of the device’s software driver also has a significant role to play here. Two things to be aware of here are that Thunderbolt there are many interfaces which use the older Thunderbolt 2 but most current computers have Thunderbolt 3 ports. You can use Thunderbolt 2 interfaces with Thunderbolt 3 computers but the necessary converters are quite expensive. Secondly, many USB interfaces are ‘Class Compliant’. this means that they don’t need you to install a software driver. This is very convenient and means that devices have a good chance of being suppoirted for longer. Better performance is often available using a dedicated driver though. For example RME interfaces have an excellent reputation, largely due to the quality of their drivers. This is an area where research is necessary but my advice is go with the better known companies.
If you already have a clear idea about what kind of work it is you want to do in your studio you’ll be halfway towards choosing an appropriate audio interface because you’ll have a reasonable idea about how many inputs and outputs you’re going to need. If you don’t anticipate needing to record drums or a whole band together then in terms of inputs, you probably don’t need more than two. Most audio interfaces provide facilities for recording using a microphone via an XLR input and the phantom power necessary for using condenser microphones. They will also provide a line input, usually via a quarter inch jack though this might be presented as a ‘Combi’ connector, which is a combined XLR/Jack socket in one. There will also probably be a ‘hi Z’ input which is necessary for recording the output of electric guitars and basses. If you are a DJ you might think you need phono connectors but for anything other than turntables a converter is all you need.
Recording a Band
With only two inputs, it is possible to record all the elements of a typical band recording apart from the drums. Drum kits typically require several microphones. Many people want to record bands performing together all at the same time, and this increases the requirements in terms of equipment considerably. 16 simultaneous inputs is a good number to aim for in the first instance. It’s important to identify how many of these inputs are for microphones as while it’s possible to record keyboards and guitars via line and Hi Z inputs, if you’re trying to record a drum kit at the same time as vocals and acoustic instruments you’re inevitably going to need more than eight simultaneous inputs.
If you are recording acoustic instruments, guitar amplifiers or singers, you’re going to need a microphone. If you’re buying a first microphone, consider a condenser mic. You can get a good quality cardioid pattern condenser for surprisingly little money. You won’t go far wrong with well-known brands and if you’re interested in recording in stereo then looking for a cardioid-only model which has a multi-pattern version also available means that you could buy that multi-pattern version at a later date and try recording stereo using various different techniques using your cardioid mic with your multi-pattern mic. If you’re recording vocals or podcasting then dynamic microphones can be useful. They sound ‘drier’ and as a result can be more suitable in poorly treated or noisy rooms. Be aware that while you need phantom power to use a condenser microphone (most interfaces provide this).
Latency
The other aspect of an audio interface, which needs careful consideration is the number of outputs. For basic productions two outputs, one for a pair of monitor loudspeakers and one for a pair of headphones is sufficient. If you are recording someone other than yourself you’ll probably want a second headphone output and if you are recording a whole band it is usually desirable to give everyone a separate headphone mix via its own output. But things get more complicated still with live tracking of bands because of latency. It is the often unexpected ‘fly in the ointment’ for computer-based studios which initially seem relatively straightforward.
Latency occurs because it takes a certain amount of time for a computer to do the necessary work to calculate the results of all of the mixing and processing which happens in a DAW. During mixing this doesn’t affect the user significantly. There is a very short pause between hitting play and hearing the music, but it makes little practical difference. This is not the case when recording into a DAW. Even the shortest of delays between singing or playing and hearing the result in one’s headphones can be very distracting. A powerful computer can reduce this latency significantly but not completely. If you’ve ever heard about how expensive Pro Tools HDX systems are compared to a copy of Logic Pro, the different ways these two systems handle latency is a lot of the reason this difference exists. Latency can be worked around in various different ways, but it presents a rather intractable technical issue to new users, and new users are by definition the least well equipped to navigate these problems. Some of the more advanced audio interfaces offer DSP mixers to help manage latency while recording, simpler systems provide a mix control which while less sophisticated can also be very successful at avoiding latency problems while recording.
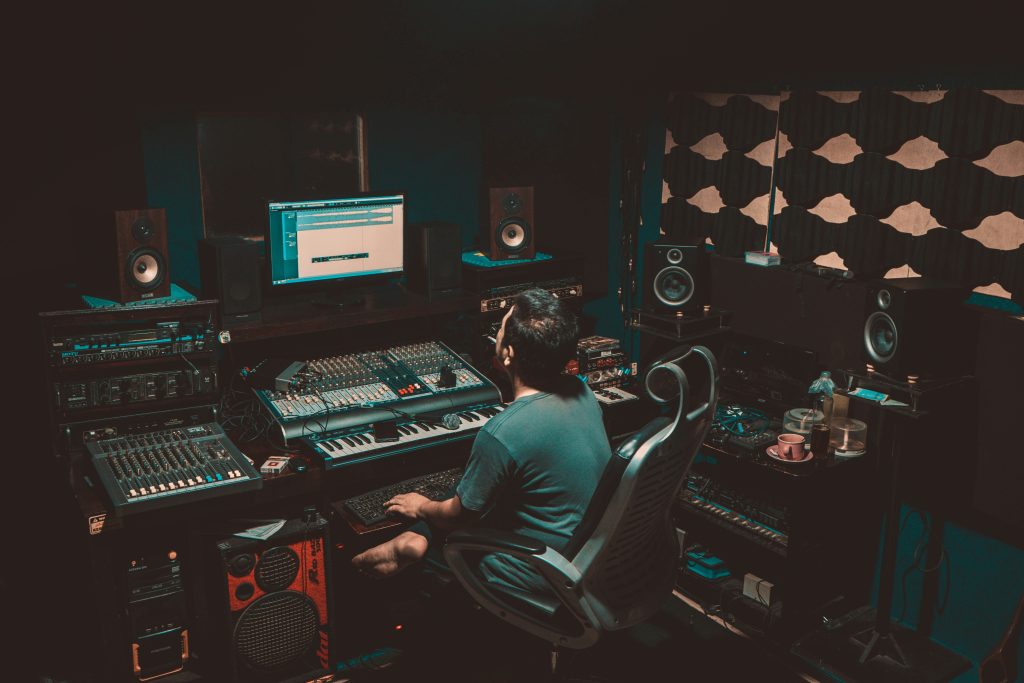
Monitoring
For somebody setting up a studio at home for the first time it’s probably going to be used for stereo work, but if an immersive format like Dolby Atmos or Sony 360 were a consideration, that would have a bearing on the selection of an audio interface as it would need to have sufficient outputs and monitoring facilities for these purposes.
This leads us to the subject of monitoring. You have a DAW and an interface and you will also need a way to hear your work. Headphones are a given. Very few people don’t already own a pair of headphones which are suitable for use in a home studio. For studio use, bluetooth headphones are best avoided. They introduce latency and can also involve data compression which changes the audio quality. With wired headphones the main distinction to be drawn is between closed and open-back headphones. Closed-back headphones leak less sound to the outside world than open back headphones and so are more useful when recording in front of a microphone where open back headphones would produce sound, which can be heard by the microphone. They are also easier to wear for long periods. It is possible to produce and mix entirely on headphones, but most people agree that it is necessary to hear your music on loudspeakers at some point and the choice when it comes to buying a pair of monitor loudspeakers is bewildering.
Here is some general advice on choosing your first pair of monitors.
Unfortunately, there is an inescapable fact about listening to music over loudspeakers – what you hear is always influenced significantly by the room that you are listening in. While the music might sound good in your studio, frequently the music sounds different when it’s played back on a different system in a different room. This is known as poor mix translation and is a really intractable issue with home studios. I’ll cut to the chase here. There’s no magic solution. It’s just a fact of how sound behaves. However there are some things which you can do to help yourself. The behaviour of speakers in rooms is a big subject but when looking at your space and deciding how suitable it is, the size, shape and layout of the room is going to affect the results that you get.
Acoustics
If you’re recording in a room using microphones then the sound of the room will be recorded too. In typical domestic rooms this is usually undesirable. This can be addressed to some extent using acoustic treatment. Treatment is also part of the solution to issues with monitoring over loudspeakers and mix translation so treating your room is always a good idea if you can. However, there is a great deal of confusion around this subject. Firstly, acoustic treatment and soundproofing are different. Soundproofing is what you need if you need to stop sound from escaping your studio and disturbing your neighbours or if you’re working in a noisy environment and need to keep sound out of your studio. The bad news is that this is very hard to do. It requires significant expense and a lot of additional material.
Acoustic treatment is different. Acoustic treatment changes the way the room affects sounds made in it, whether that is performances being recorded or recordings being played back over loudspeakers. Acoustic treatment principally uses sound absorbing materials to soak up sound energy. The thicker the absorber material the lower the frequency it can absorb. Thin lightweight foam products or similar will not be effective at anything other than high frequencies. Many of the acoustic problems encountered in home studios tend to be at bass frequencies and these require the building of large, thick bass traps.
There are products available which some people refer to as ‘room correction’ products. More correctly they are speaker calibration products, and what they do is they measure the output of speakers in the room via a microphone and calculate the difference between that sound and the original sound and correct these differences. This sounds ideal and they can be extremely effective, but only for certain problems. One problem that they cannot solve is dips in low end response caused by ‘room modes’. These modes are caused by standing waves in rooms and cannot be fixed using the solutions. This is not well understood. Bass problems in home studios are difficult to deal with which is why so many people use alternative references like checking mixes on headphones, in the car, and in other rooms.
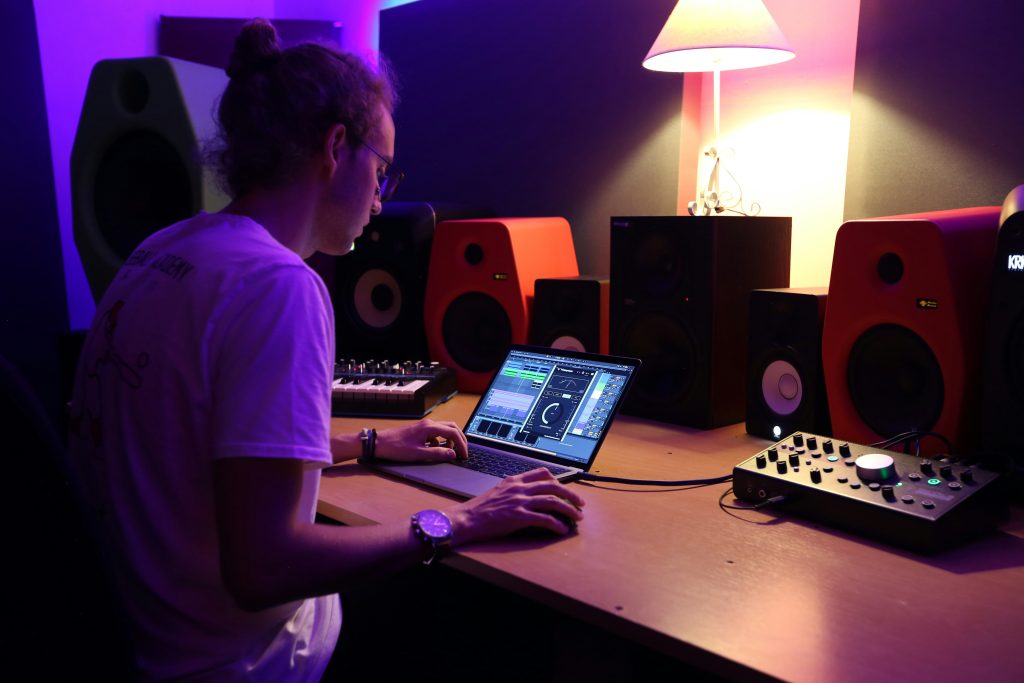
Choosing the right studio monitors for a home studio
Almost all monitors are active these days. This means that the amplifiers are built in to the speakers, which is both more convenient and also means that the designers can precisely match the amplification with the other components in the speakers resulting in some excellent performance for relatively little cost. For a typical home studio a two-way active monitor with a tweeter and a 6 inch bass/mid driver is an excellent place to start. There are many popular models available and, while the very cheapest might be best avoided, you don’t have to spend a great deal of money before you start getting something that’s extremely usable. Recommended brands would include Genelec, ADAM, Neumann and Dynaudio and at the more affordable end check out IK Multimedia and Kali Audio. Combine this with some acoustic treatment and some speaker calibration software and excellent results can be achieved without spending as much as you might think.
Your monitoring system is the limiting factor on the quality of results you can achieve in your home studio and rather than spending your initial budget on things which might appear to be more fun, my advice would always be to spend any spare money on acoustic treatment. Even if you’re in rented premises there are ways you can treat a room without upsetting your landlord, but rather than sticking carpet and egg boxes on the walls (both terrible ideas) do some research first.
Choosing the right plugins for a home studio
I haven’t said anything at all about which premium bundle of plugins you should buy. My advice for somebody setting up a studio would be to get to know the stock plugins in your DAW really well. Good mixes are about good decisions, not about slightly better plugins. There are some fantastic free plugins available – the quality of which sometimes rivals their paid-for counterparts. The exception to this is buying plugins which enable you to do something which would be unachievable with the tools you already have available to you. A loving re-creation of a vintage compressor is great fun, but you probably already have a compressor. However, if you need to do something which falls outside the capabilities of the plugins you already have, then of course buying a new plugin that fulfils that role is perfectly justified.
Don’t forget stands and cables, and everything else
Something which is very overlooked is the need for suitable stands, cables and even furniture. If you are going to be working for long periods, get a suitable chair. Your monitors need to be at the right height and position to provide the best stereo image. Similarly, mics need good quality stands so they stay where they are put. The need for significant amounts of cabling is vastly reduced compared to how things were in the days of mixers and tape but even these modest amounts of cabling can unexpectedly erode a budget. And lastly, once you have everything in place and you can create to your heart’s content, do you have a way to make backups of all these multitrack sessions you have created? You will need a backup one day, so start backing up now!
If you are thinking about setting up a studio for the first time it can seem that there is a bewildering number of things to consider. There are but don’t be discouraged. It’s both achievable and rewarding. Nobody’s studio is perfect so don’t think that because you have to compromise you’re doing it wrong. And remember, nobody ever finishes their studio. they might think they do but before long they will change it!
Written by Julian Rodgers – Julian Rodgers has been working in professional audio for thirty years in recording studios, live sound and education. He has been a Pro Tools user for over twenty years and as well as being Editor of the Production Expert blog writes for other publications such as Sound On Sound.
We’re in the middle of a seismic shift in the music industry thanks to the continuing demand for immersive mixes in addition to the stereo mixes we’ve been doing for decades. I think this is a positive for the industry. It opens up opportunities to hear music in ways that were difficult or impossible before, and it demonstrates the music industry’s ability to keep pace with technological advancement.
Adapting to this shift is, however, comparatively expensive. A proper immersive mixing studio is a big investment. The question of just how much immersive music mixing work can be done on headphones comes up frequently. The accepted wisdom is always ‘don’t send out an immersive mix until it has been heard on loudspeakers.’ I believe this to be true. But simply saying that is unhelpful without going into more detail.
For context, I’ve listened to a great deal of music in great Dolby Atmos studios, and have mixed a lot of music in these studios, as well. Here are some of the drawbacks of mixing on headphones, along with some of the lesser-known benefits of mixing on headphones which I have observed. The best way to work on immersive mixes with headphones is with Audiomovers’ Binaural Renderer for Apple Music.
Let’s imagine you’re working on a pop or EDM mix and you’ve already firmly established the bass and drums mostly in the Left/Center/Right speakers. Additional, lighter elements, such as an added synth part, background vocals, or percussion overdubs can be safely pushed into the height channels for excitement and added dimension. It’s unlikely you’ll make a mistake in headphones here. However, if you’re working with multiple microphones in an acoustic mix, and you have a mixture of spot microphones, room mics, or even ceiling mics at your disposal, the height channels need to be dealt with more carefully. One of my biggest Atmos mixing mistakes was during the production of a classical string quartet album. I had ceiling mics, and as I raised the level of the ceiling mics, there was a fine line between those microphones adding space, and those microphones putting a second string quartet up on the ceiling! This was nearly impossible to hear on headphones, but embarrassingly obvious on loudspeakers. Fortunately, I fixed the mistake before delivering an ADM to the record label.
Careful with those height channels!
Grammy-winning classical and jazz producer Silas Brown talks about the heights in a recent conversation: “I would find it very challenging to mix an Atmos release on headphones without at least being able to check it periodically on speakers. Some concerns I would have would be getting the height dimension and also the surround material balanced just right. But these raise different issues for me. When the height material is integrated well on speakers, I feel it adds tremendously to both the ‘3D’ quality and the suspension of disbelief, where the listener stops hearing a recording and starts connecting to the music. It’s not just about having energy above you, it changes the way I perceive an instrument in front of me, making it more 3-dimensional and ‘real’ for lack of a better term. But to get it just right is often a difference of a few degrees, or a very small change in ‘Size / Divergence’. I find that when judging the height relationship on headphones, I usually can’t tell when I’ve hit this narrow ‘sweet spot’ and the mixes therefore don’t have as much of this dimensionality.”
SIDE SURROUNDS
Over-filling the side surrounds is probably the most common mistake I hear in mediocre Atmos mixes. This tends to occur when starting an Atmos mix with a collection of stereo stems. All the stems start up front in the Left and Right, and the consistency between stereo and Atmos is very high. The mixer is then tempted to fill the space, and the very first thing they reach for are the Front/Rear pan knobs and pan a stereo stem halfway back into the room. In headphones, this sounds a bit more dimensional, and you might think it’s fine. I almost made this mistake recently while mixing an orchestral piece of music for a television show. The harp had a pair of close mics which made glisses move from left to right through stereo space in a very nice (somewhat clichéd) way. But panning this pair halfway back and listening on a 7.1.4 loudspeaker system made the harp sound like it was 19-feet wide and each gliss sounded like a stomach-churning side-surround roller coaster. Great Atmos mixes do fill the room. But we all got into the habit of making things (even individual instruments) sound as wide as possible in stereo. The Atmos loudspeaker-canvas is much bigger, there’s no need to make everything super-wide. Pushing the harp mics closer together and steering them more into their natural orchestral position was the answer, along with some immersive reverb. The harp was still impressive, but it was no longer racing across the room. Again, this problem was difficult to hear on headphones and obvious on loudspeakers.
Multi-platinum mixer Joseph Chudyk weighs in on this issue. Chudyk has a wide-ranging discography in country, indie rock, metal and pop. “One of the things I notice when I start a mix on headphones, and then transition to speakers, is that the location of musical elements is usually unnatural sounding and uncomfortable. The reason I’ve found for this is that these elements are pulled too far off the front wall with no solid foundation for the mix. And this is almost impossible to anticipate if you aren’t working in an Atmos-enabled room with speakers. This is something that even an Atmos mastering engineer would have difficulty remedying. Also, I have found that making the mix sound great in speakers almost ensures better translation to Apple Spatial Audio and Dolby Binaural. While working the other way around can create more issues and almost guarantees “chasing your tail” to get the mix to work on all consumer playback mediums.”
“You know, I think the side-surrounds are a little loud…”
IMAGING
In most cases, immersive mixing is very revealing of any problems you might have in your recorded tracks. But in one notable case, conventional headphone stereo playback can reveal imaging problems that would otherwise be missed while working in immersive—drum overheads, stereo choral mics, the spaced pair in front of an orchestra—all of these techniques aim to create a coherent soundstage where the placement of instruments or voices is well-defined from left to right. When these mics are too far apart, it creates an incoherent stage. This problem is somewhat harder to hear on loudspeakers because of natural room crosstalk. But even worse, monitoring in an immersive headphone format like Apple’s Spatial Audio, and to a certain extent Dolby’s AC-4, actually glosses over the problem because those immersive headphone formats introduce artificial crosstalk between the channels. This is a case where the engineer should always check these pairs in standard stereo on headphones. The incoherence will be easily heard as a gap in the middle, and highly incoherent imaging can cause aural discomfort. The fix is usually to toe-in the mics and/or the panning until the image is consistent. And in this case, headphones win out over loudspeakers for fixing this classic problem.
Is your stereo image so wide that there’s a giant hole in the middle?
SIZE
The object “size” control in the Dolby Atmos panner used to be one of the riskiest knobs to tweak while monitoring in headphones. This was because as the size value went up on an individual object, there was additional correlated signal being sent to the surrounding loudspeakers. But it was nearly impossible to hear this problem on headphones. I referred to this correlation as “dead-spots” in the Atmos canvas and rarely turned any object up over 10-12%. But to Dolby’s credit, they recently re-engineered the size algorithm with much smarter psychoacoustical filtering, and the result is now musically useful and a bit easier to hear on headphones. Regardless, less is more when it comes to using size in music mixes. If you are mixing in headphones, use size judiciously. High percentage values are probably best suited to television and film projects and less useful for music.
Note that this single object set to a 100% size value is delivering energy to all of the speakers in my 7.1.4 system.
METERING
Meters are not all that informative when it comes to the aesthetics of mixing. But if there were one image that could sum-up a safe, and somewhat bland style of Atmos mixing, this would be it:
You might call it “stereo with decorations.” The great majority of the energy is in the L and R. The center channel (C) has just a little ambience in it, the LFE is a bit overcooked, and the rest of the channels have a few lightweight overdubs. To be fair, this distribution of energy translates well between loudspeakers and headphones, so if you are unsure of the balance of your Atmos music mix, you could use this picture as a guide. But, I find that too much adherence to this distribution underutilizes the format. Some of my favorite, more adventurous albums tend to have a more even distribution of energy around the room.
BASS, LOW FREQUENCY EFFECTS CHANNEL AND HEADPHONES
This is more anecdotal, but I feel like the quality of bass response in high-end headphones has improved considerably in the last few years. Focal, Campfire, and AirPods Max headphones reproduce frequencies I am unaccustomed to hearing without a full-range speaker or subwoofer. The headphone brands we were using in recording studios and on film sets fifteen years ago are simply not up to today’s standards. My advice is to get AirPods Max at a minimum and use them as a consumer reference. There are a startling number of young people who own these headphones. The old maxim that ‘it doesn’t matter what the mix sounds like because the kids are listening on earbuds’ no longer applies.
It’s wise to remember that Atmos is a format that does bass-management evenly anywhere in the three-dimensional Atmos canvas. What this means is that you can mix an absolutely earth-shaking record with literally nothing in the LFE channel. Some mastering engineers take this approach. But in practice, many mixers in post-production and also in hip-hop, pop, and EDM will utilize the LFE for what it is meant for:- as an effect. With this generation of headphones, it’s important to remember where and when your LFE channel will be heard. When Dolby was building the Rrenderer, they thought long and hard about the LFE and decided to include it in the binaural AC-4 render. Apple’s Spatial Audio also includes the LFE channel. But in a stereo re-render from Atmos, the LFE is dropped. That said, the majority of stereo album mixes today are done independently of the immersive mix, and the engineer has the choice of bringing that energy into the stereo channels or not.
Touching on frequency range and bass, accomplished sound supervisor John Bowen writes, “Full frequency response, crosstalk, and room feedback – all missing to some extent on headphones. Some things that you’d never notice in headphones will pop in speakers. And speakers are a must for all things bass, including LFE balancing (if you’re using it). After years of going back and forth, I feel like I’ve developed a good feel for what I’m hearing in both cases, and that’s the real goal.” Bowen has spent many hours on film and television mix stages. These stages are typically designed to reproduce very low frequencies accurately. While I am personally impressed by the new generation of headphones, I do take Bowen’s advice and carefully check the low-frequency impact of my music mixes on a bass-managed loudspeaker system with an LFE channel.
This one goes down to 11! (11 Hertz)
CONCLUSION
From an acoustician’s point of view, the binaural headphone reproduction of a real loudspeaker-based immersive mixing studio should be indistinguishable from the real thing. During the height of the Covid-19 pandemic, I became aware of bespoke HRTF headphone models that Sony was making for its mix engineers so they could mix at home, but perceive the sound of one of their very large (and very expensive) film mixing stages while doing so. While that was a great solution to very unusual circumstances, I have yet to hear a headphone model that could replace even my modest 7.1.4 mixing studio. Grammy-winning recordist and mastering engineer Mark Donahue was describing his workflow on the phone to me, “I almost never listen to it on headphones. I will listen to it for maybe three minutes, checking a few spots – just to make sure I haven’t done something horrifically wrong.” This comment is ironic, because I’m listening to his recent recording of Tchaikovsky’s Symphony No. 5 on headphones right now and it’s stunning. But maybe Mark’s comment is also informative. He knows that if the loudspeaker mix is right, the headphone mix will be, too.
For those of you using only a pair of headphones to mix and who were hoping to release an album in Dolby Atmos, I am sorry to say that the accepted wisdom is still true. Don’t send out an immersive mix until it has been heard on loudspeakers. But that doesn’t mean you have to hear it on loudspeakers. Buy a couple of hours of time in a Dolby Atmos studio with an engineer who shares your aesthetic and send them the ADM for feedback. This could be a mastering session, or just a critique. I guarantee it’s worth doing and it’s worth convincing your clients to spend a little extra to get this done. All of the pitfalls I’ve outlined above (and more) will be avoided, and you’ll be confident that your mix is playing well in every consumer listening environment.
Written by Nathaniel Reichman – Grammy-nominated producer and mixer with over twenty years of experience in the audio industry. He is the immersive-music mixer at Dubway Studios, a television re-recording mixer at Beatstreet NYC, and the audio producer for composer John Luther Adams. As co-founder of the new software company Immersive Machines, LLC, Nathaniel is pushing the envelope in both the art and science of Dolby Atmos™ home theater mixing.
In this video, Help Me Devvon, gives a full breakdown of OMNIBUS 2.0.
From routing audio between applications and hardware I/O to splitting audio from one source to several destinations for easy A/B, watch to learn how to use OMNIBUS to streamline your music production, mixing, immersive or live streaming workflow.
You can try OMNIBUS for free now at the link below.
Binaural Renderer for Apple Music is now available as a standalone application for desktop. Binaural Renderer applies Apple Spatial Audio rendering to Dolby Atmos 7.1.4, allowing you to monitor how the spatialized audio will sound when uploaded to and streamed on Apple Music.
With Binaural Renderer for Apple Music you can choose headphones or speaker profiles for music or movies with headtracking and personalized HRTF options available with supported headphones, giving you peace of mind and confidence in your mix or master.
The new standalone application features additional functionality, not available in the plugin version:
16-channel virtual driver (named ‘Binaural Renderer Link’) that allow users to place the Binaural Renderer app between the Dolby Renderer output and the output audio device of your system.
12-channel Spatial Renderer input which can be copied (Pass thru) to any audio device in a system so you don’t lose your speaker routing.
For convenience, the application also features two 2-channel pass thru aux inputs, which can be used to quickly A/B between different versions of binaural and stereo material.
You can now stream multichannel Dolby Atmos 7.1.4 audio to your iPhone or iPad, and apply Apple’s Spatial Audio rendering to the received stream with the LISTENTO iOS Player.
To take advantage, you’ll need a LISTENTO Pro subscription. Your listeners don’t need any subscription to receive the stream.
This update means engineers working on Windows machines can now monitor their Atmos audio as it will sound when uploaded to Apple Music by streaming with LISTENTO Pro to either an iPhone or iPad.
WATCH VIDEO
Just as with Binaural Renderer for Apple Music, the app connects to Apple’s spatialization processing, so any changes published by Apple will be automatically picked up, giving you peace of mind that you are hearing the same thing as listeners on streaming.
Discrete output to class-compliant audio devices
Stream audio to your iPhone or iPad with no lengthy setup or back & forth
Apply binaural rendering to 7.1.4 multichannel streams
Today at The NAMM Show, Audiomovers announce a landmark update for OMNIBUS – OMNIBUS 3.0.
As well as new networking options, OMNIBUS 3.0 also features a revamped UI and improvements to existing features for far greater flexibility when routing audio.
Read the full story and see the full feature breakdown here.
Keep up to date with all the latest at #NAMMShow here.
Binaural Renderer for Apple Music – ver 1.56 – Released 16th January 2024
Introduced wave meters that display intensity of an input audio signal.
Users can now rearrange the input signal flow in the plugin by dragging and dropping.
Introduced ability to solo an input channel before reordering (for convenience).
Introduced a “reset by default” button for the plugin, that resets plugin back to standard I/O flow. Based on the channel order of the DAW.
When the plugin is used in Pro Tools, there are different types of “reset to default” button options for input channel routing, based on preferred I/O setup.
Apple Silicon Macs running Mac OS X 12.6+, 64 bit (Render mode will not have the full list of render mode profiles available if running MacOS on an Intel processor)
Supported DAWs/hosts:
Pro Tools 2023.6+, Logic Pro 10.7+, Nuendo 11.0.3+, Cubase Pro 12+, Reaper 6.66+
Supported channel widths:
5.1, 7.1.4
Download and install, then follow license activation guidance.